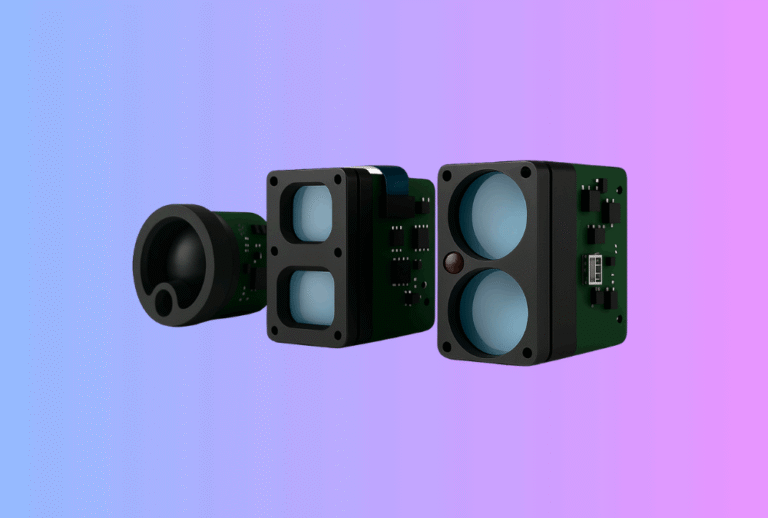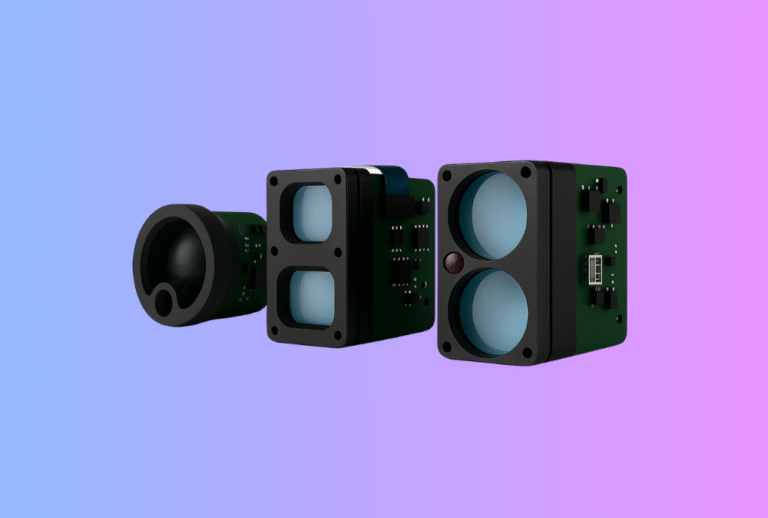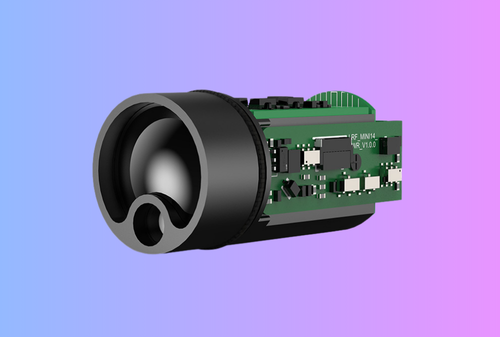
A laser rangefinder module can look deceptively simple in an engineering presentation. It is a compact subassembly, it has a published ranging spec, and it appears to need only power, communication, and mechanical mounting. In real OEM projects, however, that view is too shallow. The module is not just a sensor. It is an opto-electronic subsystem whose performance depends on alignment, enclosure design, power stability, firmware behavior, environmental drift, and production discipline.
Table of Contents
ToggleThis is why a proper laser rangefinder module integration checklist matters. If your team handles the module as a line item on the bill of materials rather than as a system-level integration task, you can easily lose months in redesign, debug, and field complaints. For OEM engineers, the goal is not merely to make the module work on the bench. The goal is to make it repeatable, manufacturable, supportable, and predictable across EVT, DVT, PVT, and mass production.
Why integration fails even when the module itself is good
Many integration problems are not caused by a bad rangefinder module. They are caused by a mismatch between what the module was designed to do and how the host product uses it. A module may meet its own datasheet in a controlled lab, yet underperform in the final device because the optical window adds loss, the enclosure shifts boresight, the power rail sags during burst current, or the host firmware interprets noisy returns as valid targets.
This is especially common in handheld devices, thermal optics, UAV payloads, surveying tools, and embedded industrial products. The engineering team often focuses first on headline metrics such as maximum range, accuracy, size, or price. Those matter, but they are not enough. The real integration question is more demanding: what has to be true across optics, mechanics, electronics, firmware, and test for this module to perform reliably in our actual product?
If your team is still at the early evaluation stage, it is worth starting with your broader rangefinder module integration page and your core laser rangefinder module product overview before using the checklist below. For engineering teams already moving into implementation, this article is the operational version of that conversation.
Start with the use case, not the module
Before you lock a module, define the real application envelope. A laser rangefinder module for a compact monocular, a UAV payload, and a smart surveying tool may share the same ranging principle, but the integration priorities are completely different.
In a handheld optic, user aim stability, eye box tolerance, enclosure size, and UI feedback may dominate. In a UAV payload, deterministic timing, vibration, weight, and host bus choice can be more important than cosmetic packaging. In industrial equipment, cable length, EMI, sealing, and maintenance access often become the deciding factors. The module should be selected around the product mission, not the other way around.
This sounds obvious, but many OEM projects still begin with the wrong question: “Which laser rangefinder module has the longest range at the lowest cost?” The better question is: “Which module, interface, and integration architecture will survive our real operating conditions and product roadmap?”
That framing will influence nearly every item on your checklist, from optical path design to whether you use UART, CAN, or another communication layer.
The integration checklist at a glance
The cleanest way to manage an OEM laser rangefinder module integration program is to break the work into eight domains. Each domain should have an owner, acceptance criteria, and a review checkpoint.
| Domain | What must be defined early | What typically breaks later |
|---|---|---|
| Use case and spec | Range envelope, target types, ambient conditions, response time | Wrong module fit, unrealistic field expectations |
| Optics | Beam divergence, window, alignment, boresight | Missed targets, false returns, lost range |
| Mechanics | Mounting, tolerance stack, sealing, shock path | Drift, fogging, vibration failures |
| Electrical | Rail stability, inrush, grounding, cable design | Brownouts, noise, unstable ranging |
| Interface and firmware | Bus, protocol, timing, error handling, update flow | Data loss, latency, poor UX |
| Thermal and environment | Internal heating, condensation, temp drift | Field inconsistency, intermittent faults |
| Validation | EVT/DVT/PVT criteria, jigs, logs, golden sample | Endless debug, unclear release status |
| Production handoff | Revision control, traceability, factory tests | Yield loss, service issues, change chaos |
The table is simple, but the discipline behind it is what saves programs. A checklist only works when every line item becomes a documented engineering decision rather than a verbal assumption.
Checklist item 1: define the target model clearly
A laser rangefinder module does not range “distance” in the abstract. It ranges specific targets under specific conditions. That means your integration brief should define not only the nominal distance, but also what kind of target the customer cares about, how reflective it is, how stable the platform is, and what ambient light or clutter is expected.
For example, a module that performs well on cooperative targets in controlled testing may behave differently when aimed at dark, angled, moving, or partially obscured objects. If your product is used in brush, bright sun, fog, vibration, or through a protective window, those conditions belong in the requirement from day one.
A practical engineering brief should include the minimum and typical target size, reflectivity assumptions, distance bands, update rate expectations, and how the host should behave when the signal is weak. If you do not define those conditions early, your team will end up debating “accuracy issues” later that are really requirement issues.
This is also the point where product managers and engineers should agree on what success looks like. Is the user expecting single-shot distance confirmation? Continuous scan? First-target bias? Last-target filtering? If those behaviors are not defined now, the firmware and UI teams will make inconsistent assumptions later.
Checklist item 2: design the optical path as a system
Optical integration is where many promising prototypes become frustrating products. A laser rangefinder module is not isolated from the host enclosure. Its beam path, receiver path, protective window, and alignment scheme all affect real performance.
The first question is beam geometry. Your team needs to know how beam divergence interacts with target size, user wobble, and background clutter. A narrower beam can improve target discrimination, but it may also become harder for unstable handheld aiming. A wider beam may feel forgiving in use, yet capture unwanted background returns. This is why beam divergence should be treated as an application-level design choice rather than a spec sheet footnote.
The second question is the window and enclosure path. The protective cover in front of the module must not be treated as a generic industrial design feature. Window material, coating, angle, contamination behavior, and mounting stress can all alter the signal path. Even when transmission loss looks small on paper, ghosting, contamination, or alignment shift can become the real problem in the field.
The third question is boresight. If the laser emitter, receiver, and aiming reference are not mechanically stable relative to one another, performance may appear acceptable in early tests and then drift under shock, temperature cycling, or torque during assembly. Your project should define how optical alignment is set, verified, and protected in production. That includes fixture strategy, adjustment points if any, and acceptable residual alignment error.
Checklist item 3: do not let mechanics be “someone else’s problem”
Mechanical integration is often underestimated because the module is small. But a compact module can be even more sensitive to tolerance stack-up than a larger optical assembly. If the mounting datum is weak, if the enclosure flexes, or if the sealing method introduces stress, the rangefinder can lose consistency long before it visibly fails.
Define the mounting concept early. Will the module be hard-mounted to a chassis, cushioned, bracketed, or isolated? Which surfaces act as datums? Which screws control position, and which simply provide retention? Where does shock energy go during drop, recoil, or transport vibration? If the host device is handheld, how much torsion enters the structure during normal use?
Sealing needs equal attention. Engineers often specify IP goals at the product level, but forget to ask how sealing affects optics and serviceability. A gasket placed without thought can load the optical path. A window adhesive can outgas. A vent can solve pressure equalization but introduce contamination risk if placed poorly. If your use case includes fast temperature changes, you also need a condensation strategy. Fogging is not only a “weather” issue. It can happen when a warm device hits a cooler outdoor environment or when the internal thermal path is unbalanced.
For teams that want a cautionary companion piece, your existing article on top 7 mistakes when integrating an LRF module is the right supporting internal link here.
Checklist item 4: stabilize power before you debug anything else
A surprising number of “algorithm problems” are really power problems. Laser rangefinder modules can be sensitive to rail behavior during startup, pulse events, or communication bursts. If the host device shares rails with displays, wireless modules, motors, or other noisy loads, the rangefinder may show intermittent failures that are difficult to reproduce in the lab.
The integration checklist should define supply range, current headroom, startup sequence, transient behavior, and grounding strategy. Do not only check whether the module powers on. Check whether the rail remains stable when the device is doing several things at once. A lab bench supply with short cables may hide issues that appear immediately in a battery-powered device with a long harness.
Cable design matters as well. Connector choice, return path integrity, shielding, and cable routing all affect noise susceptibility. This is particularly important in UAVs, vehicle-mounted devices, and industrial equipment, where longer runs and electrically noisy subsystems are common. Your electrical review should ask whether the module has its own regulated rail, whether burst current is isolated from sensitive logic, and whether the communication lines are robust enough for the installation environment.
Do not move into firmware tuning until the power domain is clean. Otherwise your team risks masking root causes with software workarounds.
Checklist item 5: choose the interface around the system architecture
Interface selection is not a minor implementation detail. It shapes the entire integration effort. The wrong bus can create noise problems, software complexity, and poor maintainability even if the module itself is fine.
When evaluating bus options, think beyond “what the module supports.” Ask what the host architecture needs over the full product lifecycle. How long are the cables? How noisy is the environment? Is deterministic timing needed? Will future accessories share the same controller? Does the product need field diagnostics or remote firmware update support? These questions often matter more than the convenience of a quick bench bring-up.
For some products, a straightforward serial link is perfectly adequate. For others, bus robustness and network behavior matter enough that a more structured interface is the better choice. This is why your existing UART or CAN discussion is a relevant supporting article, even though this checklist is broader.
Whatever bus you choose, document the protocol contract rigorously. That includes message structure, units, timestamps, timeouts, checksum rules, fault codes, boot states, and version behavior. Engineers should not have to guess how to interpret “no valid range,” low confidence, or stale data. The host firmware should know exactly what the module means and what the user interface should do in each state.
Checklist item 6: define firmware behavior from the user backward
A laser rangefinder module project can fail commercially even when the hardware performs well, simply because the system behavior feels inconsistent to the user. That is why firmware integration must be defined from the end-user experience backward.
If the customer presses the ranging button once, what should the device do when the target is weak, partially blocked, or outside the ideal operating range? Should it hold the previous value, clear the display, show a retry indicator, or fall back to scan? Should it prefer first-target logic or last-target logic? How quickly should it update? What confidence threshold should gate display output?
These are not abstract UX questions. They determine how your product is perceived in the field. They also affect support load, because users will describe inconsistent logic as “bad ranging” even when the hardware is behaving correctly.
This is where your existing firmware modes guide becomes a useful internal reference. The key principle is simple: define range acquisition behavior, filtering, and display rules before field complaints define them for you.
Engineers should also lock the firmware update path early. How are module firmware and host firmware versioned? Can the module be updated in service? What is the fallback behavior if an update fails? These questions are easier to answer before production than after your first service batch.
Checklist item 7: test temperature and environment as part of integration, not after it
Environmental validation is where many teams discover that their “working prototype” was only a room-temperature demo. Range performance, alignment, condensation behavior, and communication stability can all shift with temperature, humidity, vibration, or contamination.
Your integration plan should define which environmental conditions matter to the target market and how they will be simulated. That may include temperature soak, cycling, vibration, drop, dust, moisture exposure, and window contamination scenarios. The exact matrix depends on the application, but the discipline is universal: do not wait until design freeze to find out whether the enclosure, optical path, and power system still behave properly outside the lab.
Temperature deserves special attention because it affects several layers at once. Mechanical dimensions move, optical alignment can drift, power behavior can change, and condensation risk increases. Even when a module remains nominally functional, its field behavior may become less stable or less intuitive. That is enough to damage user trust.
Checklist item 8: build validation around EVT, DVT, and PVT gates
A strong OEM integration checklist becomes much more powerful when tied to program gates. Instead of treating validation as a loose pile of test activities, define what must be proven at each stage.
During EVT, the goal is to verify that the selected module can communicate, range, and coexist electrically with the host. This is where you prove the architecture is viable. During DVT, the goal shifts toward fit, alignment, environmental behavior, user experience, and repeatability in near-final packaging. During PVT, the focus becomes factory readiness, test time, golden sample control, traceability, and change discipline.
This stage-gate view is already reflected in your rangefinder module integration materials, where EVT, DVT, PVT, and production handoff are framed as distinct steps in de-risking a program. In practice, what matters is that your engineering team defines exit criteria, not just activities.
A useful validation package should include test conditions, fixtures, acceptance thresholds, logs, operator instructions, and sample counts. If two engineers can run the same test and reach different conclusions, the validation method is not mature enough yet.
Checklist item 9: create a receiving and production test strategy early
One of the most common OEM mistakes is treating incoming inspection and production test as factory topics that can wait until late in the project. In reality, those flows should be designed while the product is still being integrated.
A receiving checklist should screen for the most likely faults before modules ever enter assembly. That includes key functional checks, basic accuracy confirmation, repeatability review, communication integrity, and visible optical issues. Your existing top 5 tests for incoming LRF modules is an excellent related article for this stage because it translates engineering assumptions into repeatable factory gates.
At the production level, the question becomes broader. Which tests happen at incoming inspection, which happen after board assembly, which happen after final alignment, and which happen at end-of-line? Where is the golden sample stored? How are logs tied to serial number or lot? What happens when a unit is marginal but not clearly failed?
These details directly affect yield, service cost, and customer confidence. A module that works beautifully in engineering can still become a commercial problem if the factory cannot verify it quickly and consistently.
Checklist item 10: treat documentation as part of the integration deliverable
Good engineering teams often underestimate how much future friction comes from incomplete documentation. In an OEM project, documentation is not administrative overhead. It is part of the integration result.
The project package should include the agreed specification baseline, interface protocol notes, wiring and connector definition, optical alignment reference, mechanical datums, test procedures, firmware version matrix, and change-control rules. If the system includes field update or service processes, those should be documented too.
This is also where a good OEM development kit can accelerate the project. A proper kit shortens the path from evaluation to structured integration because it exposes interface behavior, basic tools, and expected workflows early. Teams that rely only on sample hardware without a disciplined document set usually spend more time rediscovering known behavior.
What a good integrated program looks like
By the time your project reaches production readiness, the engineering story should be coherent. The team should know why this module was selected, how it is mounted, how it is powered, how it communicates, how its firmware behavior is interpreted, how it is tested, and how it is controlled in production. There should be no major gap between the engineering prototype and the factory process.
That is the real value of a laser rangefinder module integration checklist. It does not merely reduce mistakes. It turns the module from an uncertain component into a predictable subsystem with defined behavior across design, validation, and manufacturing.
For OEM engineers, that is the standard worth aiming for. Not just a working demo, but a product that survives the transition from lab bench to real customer use.
FAQ
What is the most common reason a laser rangefinder module underperforms after integration?
The most common reason is not the core ranging engine itself, but system-level mismatch. Optical path loss, weak boresight control, unstable power, poor bus design, and unclear firmware logic are more common causes than a fundamentally defective module.
Should OEM teams choose the module based mainly on maximum range?
No. Maximum range is only one variable. The better selection approach includes target type, environment, beam behavior, update logic, power budget, interface needs, and production testability.
When should incoming inspection be defined?
Much earlier than most teams expect. Incoming inspection criteria should be designed during integration, not after mass-production planning has already started.
Is UART always enough for a laser rangefinder module?
Not always. UART can be perfectly adequate in many products, but bus choice should depend on cable length, noise environment, host architecture, diagnostics, and future integration roadmap.
What should be frozen before DVT?
At minimum, the optical path concept, mechanical datum scheme, power architecture, communication protocol behavior, and preliminary validation method should be stable before DVT.
CTA
If your team is evaluating a new ranging product, planning a redesign, or trying to move from engineering sample to production, the fastest way to reduce risk is to review the integration stack before problems multiply. You can start with our Rangefinder Module Integration page, explore our configurable Laser Rangefinder Module options, or contact our engineering team to discuss your target range, interface, optical path, and validation plan.
Related Articles
- Rangefinder Module Integration
- Top 7 Mistakes When Integrating an LRF Module
- Top 5 Tests for Incoming LRF Modules
- What Is Beam Divergence and Why It Limits Range
- Firmware Modes Guide: First, Last & Scan
- What a Good OEM Development Kit Looks Like for Thermal Camera Modules and Laser Rangefinder Modules