From pilot demo to repeatable delivery—that is where many FPV programs stall. This guide gives OEM/ODM teams a practical, copy-ready process to commission FPV payloads built around a Thermal Imaging Module, and to pass Site Acceptance Tests (SAT) with clear, defensible evidence.
Table of Contents
ToggleExecutive Summary
- Standardize the method, not just the metric. Tie performance numbers to scene type, target size/temperature, weather, and event-time timestamps so flight results match bench claims.
- Commissioning is a checklist. Power hygiene, time sync, boresight, and three scene tests catch 80% of field problems before customers do.
- Adopt recognizable frameworks. Public-safety programs increasingly reference NFPA 2400 for sUAS competencies and procedures—aligning your acceptance steps with these norms accelerates approvals.
- Make it export-and-channel-ready. Thermal modules can be dual-use; the EU’s Regulation 2021/821 and US BIS Category 6 rules for higher-frame-rate cameras affect quoting and shipping.
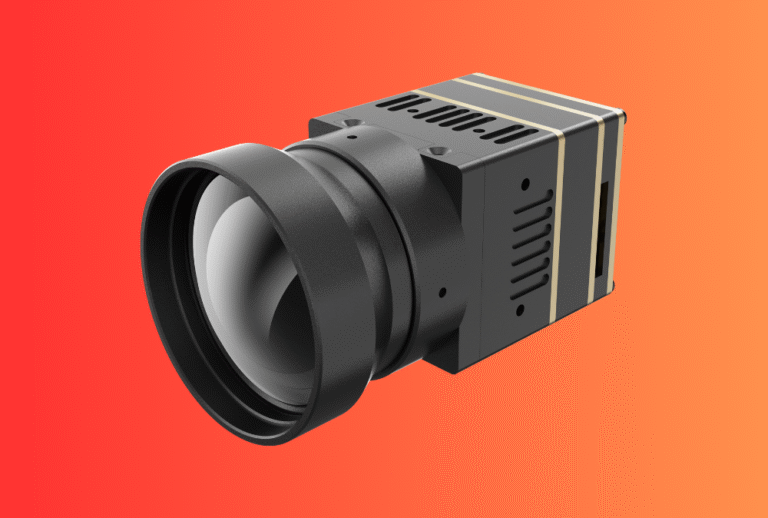
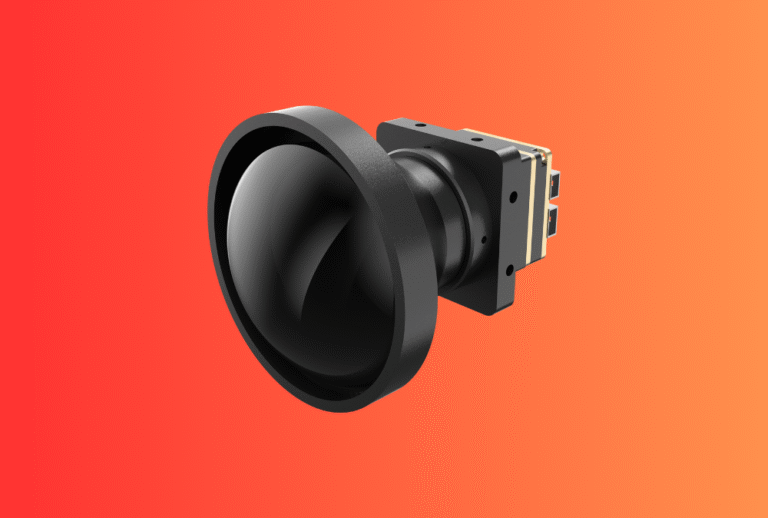
Building your payload now? Start with our Thermal camera module options. For landing-site checks or standoff overlays, add a Laser Rangefinder Module—the same SAT pipeline applies.
Use Cases & Buyer Scenarios
UAV inspection teams for utilities and rooftops
Commissioning focuses on clean power rails, wide-to-medium FOV, stable overlays at 25–30 fps, and a SAT that documents detection and repeatability on typical façades.
Public safety night FPV units
Teams need a repeatable method to show operator proficiency and system capability. Aligning acceptance with recognized test frameworks improves grant and procurement outcomes.
Demo fleets and channel partners
Distributors want kits that pass the same SAT, on any airframe, without factory engineers present. Commissioning yields fewer NFF returns and faster onboarding.
Spec & Selection Guide
What to verify during commissioning—and why
-
Optics & FOV. Choose focal length for typical standoff (scan vs confirmation).
-
Resolution & NETD. 256×192 or 384×288 with ≤50 mK is pragmatic for FPV overlays; lower NETD improves small-signal detail at dusk.
-
Frame rate. 25–50 fps looks natural; ensure the variant you ship fits your export plan (see Compliance).
-
Power integrity. Verify inrush, brownout margins, and noise isolation from the digital VTX.
-
Timestamps. Use capture event time end-to-end (sensor → SDK → OSD/goggles) so overlays do not “swim.”
-
Boresight datums. V-groove/dowel pins ensure you can re-assemble and still hit alignment.
Acceptance criteria snapshot
| Item | What good looks like | Commissioning check | Pass / Gate |
|---|---|---|---|
| Power rail | Low-noise buck, LC filter; 2× peak current headroom | Cold-start and hover-pan power log | No resets; ripple within spec |
| Time base | Single clock domain; event-time in SDK | Timestamp continuity, no jumps | Δt jitter within set bound |
| Boresight | Repeatable datums and two-point zero | Near/far alignment residuals | ≤ defined pixel or mrad |
| NETD sanity | Meets module spec in room temp | Black-body or hot/cold plate quick check | Within spec ± tolerance |
| HUD stability | Minimal widgets; no “swim” | 10–20 s dusk pan recording | No visible lag drift |
| Logs & artifacts | Serial-tied clip & CSV | Saved to job folder | Required for SAT sign-off |
Decision flow
├─ Power clean and no resets? → No → Fix buck/LC, add bulk caps → Re-test
├─ Event timestamps consistent? → No → Fix SDK/OSD to use capture time → Re-test
├─ Boresight within tolerance? → No → Re-zero on datums; torque check → Re-test
├─ Three-scene clips complete? → No → Re-fly SAT scenes and archive
└─ All gates passed → Ship + enable channel partners to run SAT
Integration & Engineering Notes
Electrical & Interfaces
-
Rails. Isolate the video transmitter and compute rails; use low-noise bucks with LC filtering. Size converters for 2× steady-state to survive cold start and AGC peaks.
-
Grounding and harnessing. Star-ground layouts reduce banding in digital FPV. Keep high-current motor lines away from module I/O.
-
Interfaces. Ensure your SDK exposes
t_event,fps,supply_mv, and simple hotspot candidates (x, y, T, conf) for HUD drawing and audit.
Considering range overlays later? Reserve a UART/CAN for the LRF feed; keep both sensors on a shared time base so SAT remains identical with or without range.
Optics & Mechanics (mounting, alignment, sealing)
-
Datums before grams. A 2–3 g penalty for V-grooves or dowel pins is worth repeatable boresight after service or transport.
-
Isolation. Elastomer standoffs tuned to the frame’s vibration spectrum stop micro-blur while keeping alignment tight.
-
Enclosures. AR + anti-fog windows and torque-controlled frames prevent tilt and keep image quality consistent.
Firmware/ISP/Tuning (AGC, palettes, HUD)
-
AGC presets. Provide linear, histogram, and target-lock modes; document palette LUTs so cross-team interpretation is consistent.
-
HUD minimalism. Use three primitives—temperature cursor, palette tag, confidence bar. Gate alarms with persistence (e.g., threshold for ≥0.5 s).
Testing & Validation (bench → field)
-
Bench timing. Use a blinking heat source and a photodiode on the goggles to measure sensor→HUD→display latency; record the delta once per serial.
-
NIST-style scenes. Adopt reproducible test scenes and fiducials; NIST PSCR work provides open test lanes and methods for UAS operator/system evaluation you can mirror.
Factory to Field Commissioning Script
-
Inventory & label
-
Verify P/N, S/N, firmware, lens, and calibration rev.
-
Prepare a job folder for each airframe.
-
-
Power & interface check
-
Run cold-start; log inrush and steady current.
-
Verify SDK connection and timestamp fields.
-
-
Boresight & mechanical
-
Mount on datums; do a two-distance zero (near 10–15 m; far 50–100 m).
-
Record residuals and torque values.
-
-
Three-scene SAT flight
-
Indoor hot/cold plates for NETD sanity.
-
Outdoor dusk pan across mixed backgrounds to check HUD drift.
-
Mission-like scene (e.g., façade or treeline).
-
Save 10–20 s clip + CSV per serial with power/FPS/clock.
-
-
Acceptance & handover
-
Reviewer signs pass/fail against gates.
-
Archive to shared drive; attach to shipment.
-
Compliance, Export & Certifications
-
Dual-use/export. The EU’s Regulation (EU) 2021/821 governs exports of dual-use items and is periodically updated; thermal cameras with higher frame rates are often controlled in the US under BIS Category 6 / ECCN 6A003—plan classification early.
-
Calibration credibility. Ask vendors for calibration artifacts or references aligned to ISO/IEC 17025—this underpins valid, auditable results in FAT/SAT reports.
-
If adding a laser rangefinder later. Your system will also need IEC 60825-1 laser product safety classification and label proofs; keep this in the same compliance pack as CE/FCC/UKCA and RoHS/REACH.
Need handhelds for ground confirmation during acceptance? Equip crews with Thermal Monoculars or Thermal Binoculars to speed decisions.
Business Model, MOQ & Lead Time
-
Sampling & pilots. 2–4 weeks (standard lenses/SDK); 4–6 weeks with custom housings/HUD skins.
-
MOQ. 50–200 pcs baseline; ≥300 pcs for custom enclosures/windows.
-
Deliverables. Module + harness + low-noise buck + mounts, SDK docs, commissioning checklist, SAT sheets, and per-serial video clips.
Simple ROI model for commissioning
| Driver | Before commissioning | After commissioning | Units/yr | Annual impact |
|---|---|---|---|---|
| NFF returns | 1.0% | 0.5% | 2,000 | −10 RMAs |
| Time to customer acceptance | 3–4 weeks | 1–2 weeks | — | Faster revenue |
| Field support calls per 100 units | 6 | 3 | — | −50% support load |
| Distributor onboarding | Ad-hoc | Packaged (docs + clips) | — | More SKUs listed |
For fusion or landing checks, consider upselling a Laser Rangefinder Module; the commissioning workflow stays the same and increases basket size.
Pitfalls, Benchmarks & QA
Seven mistakes to avoid
-
No method with the metric. “Good NETD” without scene/weather data is meaningless—tie results to conditions.
-
Using publish time, not event time. Leads to HUD “swim.” Fix the timestamp path at commissioning.
-
Dirty power rails. Buck noise and insufficient headroom cause resets and banding—verify ripple and peaks.
-
No boresight datums. After service, alignment drifts and SAT fails.
-
One golden unit. Always test at least two units and archive per-serial clips.
-
Export as an afterthought. Frame-rate/classification decisions must precede quoting.
-
Unowned acceptance. If a distributor cannot run SAT alone, you will scale support, not sales.
Field benchmarks explained
-
Detection: a hotspot appears and persists ≥N frames at confidence ≥C.
-
Recognition: operator can distinguish class (human vs vehicle) at a defined FOV/distance.
-
Identification: specific features (e.g., backpack) visible under stable exposure.
Use the same three scenes for every lot; archive the short clip + CSV for traceability. NIST’s open test lanes are a good model for repeatable operator and system evaluation.
FAQs
1) What minimum kit should a distributor receive to run SAT?
Thermal module with mounts, low-noise buck, harness, three-scene SAT script, acceptance sheets, and a sample clip as a visual reference.
2) How long does commissioning take on a new airframe?
Typically one day: morning bench checks, afternoon boresight and three-scene flights, plus documentation.
3) Do we need special calibration gear?
No class-specific rig is required for SAT—hot/cold plates and a known-temperature reference suffice. For factory calibration claims, request artifacts traceable to ISO/IEC 17025.
4) When should we add range overlays?
If missions include close approaches to roofs/obstacles or landing in poor light, add the Laser Rangefinder Module; SAT gains a single near/far range accuracy check.
5) Does aligning to NFPA 2400 help with approvals?
Yes. It demonstrates a recognized baseline for sUAS operations and competencies, which many agencies reference in their programs and training.
Share your airframe class, target scenes, and acceptance gates. We will package a commissioning + SAT kit—module, mounts, power, SDK overlay scripts, and job-ready checklists—based on our Thermal camera module family, with an easy path to integrate range via Laser Rangefinder Module.