When you pick a thermal camera module, you should check ten main things. These are resolution and sensitivity, interface options, size and shape, power needs, environmental strength, calibration and accuracy, software help, rules and certifications, cost and supply chain, and vendor help and warranty. Your needs for the application decide what you choose. You should think about waveband, minimum resolution, pixel size, and how many you need to make. The OEM Buyer’s Guide to Thermal Camera Modules helps you compare these things. This helps you get better performance, easier setup, and control costs.
Key Takeaways
- Look at resolution and sensitivity for clear pictures. High-resolution modules show small temperature changes.
- Pick the right interface so it works with your system. This stops you from needing extra adapters and makes setup easy.
- Think about the size and shape of the module. Small designs fit in tight spaces and keep products looking good.
- Check power needs closely. Using less power helps batteries last longer and keeps devices cool.
- Make sure the module meets tough environment standards. Find features like IP68 ratings for dust and water protection.
Resolution & Sensitivity
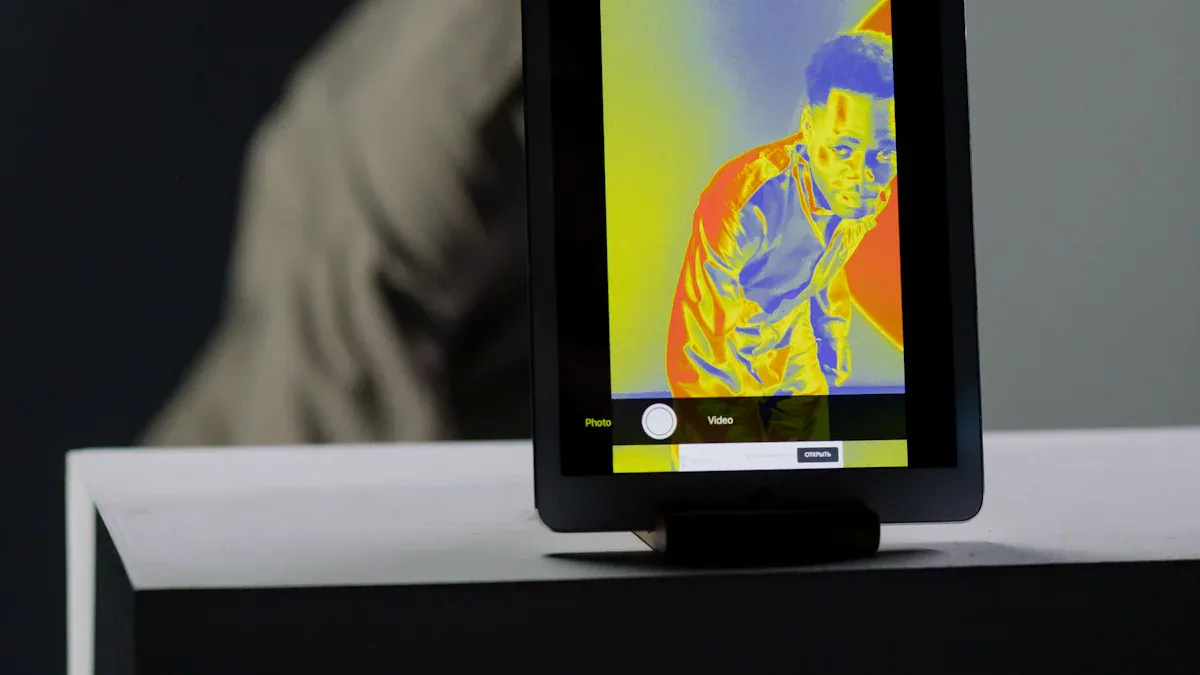
Image Quality
When picking a thermal camera module, check both resolution and sensitivity. These two things decide how clear your images are. High-resolution modules, like 640×512 pixels, help you find small problems in equipment. You get better thermal orthomosaics and need to fix fewer mistakes. Using a gimbal with a high-resolution camera makes thermal imaging work even better.
Tip: Lower NETD values mean higher sensitivity. This gives you clearer images and helps you see tiny temperature changes.
- Thermal sensitivity, called NETD, shows the smallest temperature change your camera can see.
- High-resolution modules show more detail and help you spot small temperature differences.
- Industry standards say to check NETD at 30°C for the best results.
Detection Limits
You need to know how well your camera finds small temperature changes. This depends on the sensitivity level and the sensor type inside the module. Some sensors work better with certain materials.
| Material Type | Sensitivity Level | Resistivity Level |
|---|---|---|
| Amorphous | High | High |
| Polycrystalline | High | High |
| NTC Ceramic Sensor | Varies | Inversely Proportional to Temperature |
The sensitivity coefficient (α) tells how much resistivity changes with temperature. NTC ceramic sensors lose sensitivity as temperature goes up. Pick a module that fits your detection needs.
Application Fit
Different industries need different camera features. You should match the camera’s resolution and sensitivity to your job.
| Application Type | Specific Use Cases |
|---|---|
| Automotive | Backlight Inspection, Heated Car Seat Inspection, Laser Plastic Welding, Hot Forming Steel Panels, Galvanizing and Annealing |
| Medical | Bulk Meat Processing, Pre-Cooked Meal Production, Medical/Pharmaceutical |
If you work in automotive, you need high resolution for jobs like steel panel forming. In medical fields, you need modules that can spot small temperature changes in food or medicine. Always check your job before picking a module.
Interface Options
Compatibility
When you pick a thermal camera module, check if it works with your system. Each interface type has its own benefits. Look at the table to see common options:
| Interface Type | Description |
|---|---|
| LVDS | Low Voltage Differential Signaling |
| Camera Link | Industry-standard interface |
| Single-ended parallel CMOS output | Includes clocks and sync signals |
| USB | Plug-and-play with USB-C connector |
| GigE | Gigabit Ethernet for networked applications |
| SDI | Serial Digital Interface for broadcasting |
| MIPI | Optimized for embedded applications (NVIDIA Jetson Orin) |
Many modules have HDMI, Camera Link, USB, and network interfaces. Each one connects in a different way. USB is easy to use and set up. GigE sends data far, which helps with surveillance. HDMI and SDI are good for showing high-quality video.
Tip: Make sure your interface matches your system’s ports and protocols. This stops you from needing extra adapters or making changes.
Integration Ease
You want your camera module to fit well with your platform. Sometimes, connecting sensors and lenses is hard. You need to match things like aperture size and back working distance. Small mistakes can make images blurry or give bad thermal readings. Good design and testing keep image quality high.
- USB and HDMI are easy to set up.
- Camera Link and MIPI need more work but have extra features.
Choosing the right interface saves time and lowers mistakes when installing.
System Matching
The interface you pick changes how your system works. Fast interfaces like GigE and Camera Link move data quickly. You get real-time thermal images. USB uses less power and works with many devices. MIPI is best for embedded systems, like with NVIDIA Jetson Orin Nano.
Thermal imaging cameras find heat and send data through their interfaces. How fast and reliable this is affects how well you see temperature changes. If you match the interface to your system, you get better thermograms and more accurate results.
Note: Pick an interface that fits your job. You might need high frame rates, long-distance data, or easy plug-and-play.
Size & Form Factor
Design Impact
Think about the size and shape before you design. The form factor changes how your device looks and works. Small modules fit in tight spots and make products look cool. Big modules may have more features but can make devices heavy. Pick a module that matches your design goals. Handheld devices need small modules. Fixed setups can use bigger ones.
Tip: Choose a module that fits your product’s style and job. This helps you avoid changing your design later and keeps things simple.
Mounting Choices
Mounting is important when you put in the thermal camera module. You can use brackets, screws, or clips to attach it. Some modules come with mounts built in. Others need special mounts. Check if the module works with your favorite way to mount. Easy mounting saves time and stops damage. If you use the module in different devices, pick one with flexible mounting.
- Bracket mounts are good for fixed setups.
- Clip mounts help you swap modules fast.
- Screw mounts hold heavy modules tightly.
Test the mounting method to make sure the module stays put.
Space Constraints
Space inside your device can limit your choices. Many OEM devices have small spaces, so you need a compact thermal camera module. Some modules are only 21x21mm. These fit well in tight designs and still work great.
| Feature | Description |
|---|---|
| Compact Design | Measures 21x21mm |
| Application | Good for tight spaces |
| Performance | Reliable and flexible |
Measure the space in your device before you pick a module. Small modules let you add more features without making your device bigger. This helps users and keeps your product strong in the market.
Power Needs
Consumption
It is important to know how much power your thermal camera module uses. Power use changes battery life, heat, and how you build your system. Most portable thermal camera modules use very little power. Here is a table that shows some common values:
| Camera Module | Typical Power Consumption |
|---|---|
| Uncooled Mini VOx Thermal Camera Module 256×192 | 300mW |
| New Mini 384 Uncooled LWIR Thermal Camera Module | <0.55W (at full frame rate 50Hz) |
| Infrared Temperature Measurement/Imaging Module | <0.55W @ 25ºC |
Tip: Using less power helps your device last longer and stay cool.
Some new modules use less than 0.55W, even when working fast. This lets you make smaller and lighter products.
Battery Use
If your device uses batteries, you need a module that does not use much power. Low power modules let you use smaller batteries or get more time before charging. You can use your device for many hours without plugging it in. This matters for handheld tools, drones, or robots that move.
- Ultra-low power modules, like the New Mini 384, are good for battery-powered devices.
- Using less power means less heat, so your device is safe and easy to hold.
Note: Always look at the power rating before picking a module for battery use.
Efficiency
New thermal camera modules are much more efficient now. Designers made sensitivity 1.5 times better than older models. New image processing engines give you sharper and clearer pictures. Some modules now reach a noise equivalent differential temperature (NEDT) of less than 25 mK. This is better than most industry standards.
| Improvement Type | Description |
|---|---|
| Sensitivity | 1.5x better than before |
| Image Processing | Sharper, higher contrast images |
| Noise Performance | NEDT < 25 mK |
| Detection Performance | Better detection and recognition |
| Image Clarity | Clearer details in tough conditions |
| Lens Options | More choices for different fields-of-view |
Efficient modules help you save energy and get better results. You can trust your device to last longer and give you high-quality thermal images.
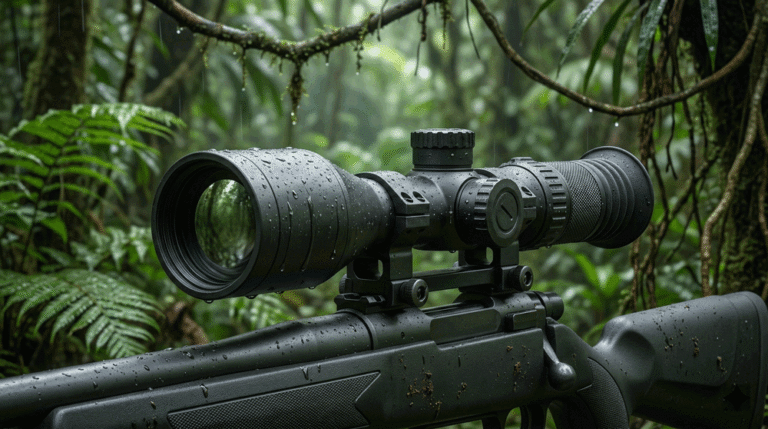
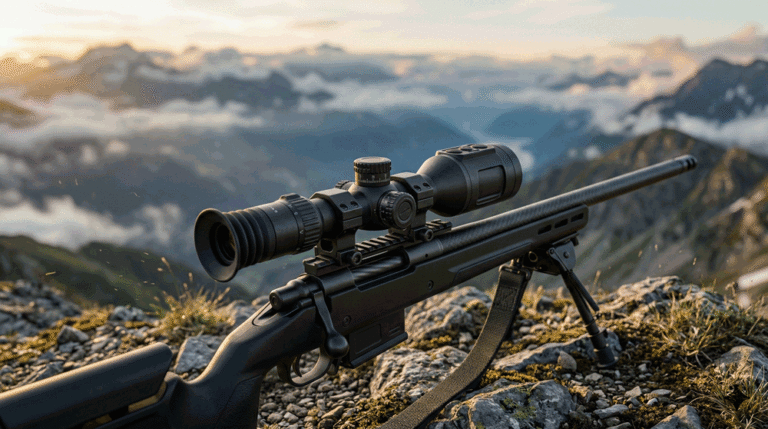
Environmental Robustness
Temperature Range
You need a thermal camera module that works in very hot or cold places. Some modules can handle super high heat. The table shows how each model works in different temperatures:
| Model | Temperature Range (°C) | Temperature Range (°F) |
|---|---|---|
| NIR-656 | 600 – 1000 | 1112 – 1832 |
| NIR-2K | 800 – 1400 | 1472 – 2552 |
| NIR-2K | 1000 – 1800 | 1832 – 3272 |
Some modules work in places even hotter than an oven. This helps you check furnaces, kilns, or metal factories. The chart below shows the lowest and highest temperatures for top thermal camera modules:
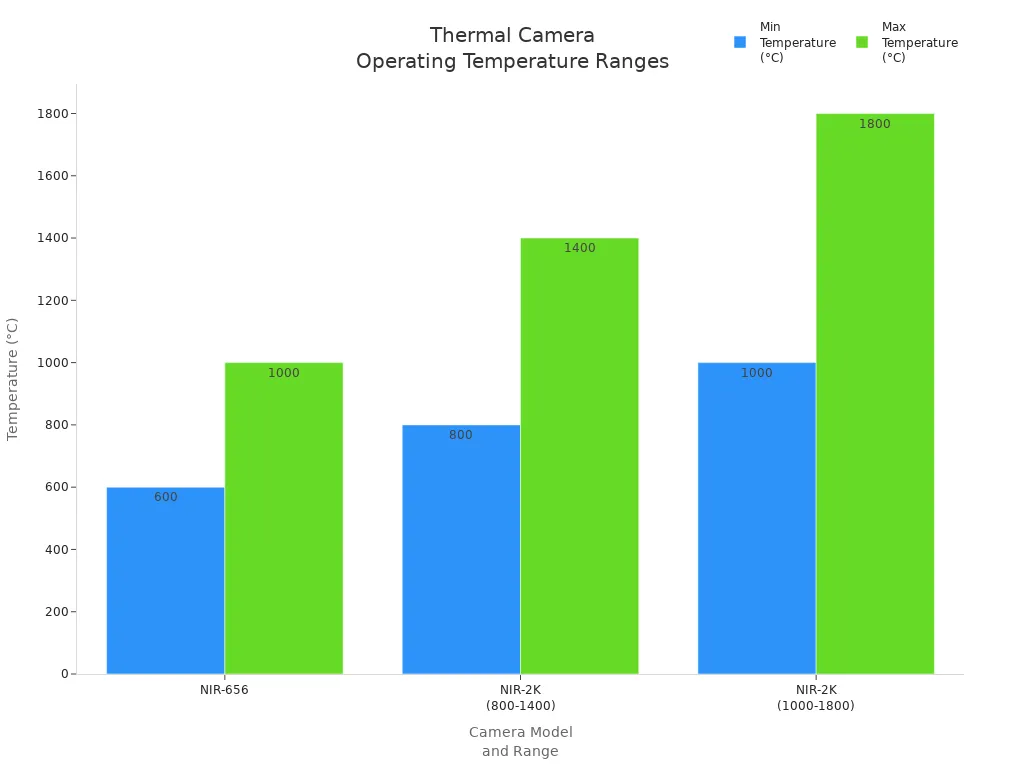
Tip: Always look at the temperature range before you pick a module. This keeps your device safe and working well.
Durability
You want your thermal camera module to last in rough places. Strong modules use tough cases made from 316L stainless steel. This metal does not rust or break easily. Many modules have an IP68 rating. This means dust and water cannot get inside. Explosion-proof certifications like ATEX and IECEx let you use the module in dangerous areas. These features protect your money and keep your team safe.
Calibration & Accuracy
Measurement Reliability
You need to trust the numbers your thermal camera shows. Reliable measurement helps you make good choices in important jobs. Camera systems must work every time, especially in places like factories or military sites. You should check if your camera passes all the tests. These tests look at temperature ranges, shock, and vibration. For example, Teledyne FLIR made MWIR cooled camera modules for tough military standards. They made the modules last longer by using a strong cryocooler. The mean time to failure (MTTF) went up from about 17,000 hours to over 27,000 hours. Some models now aim for more than 30,000 hours.
Tip: Always ask your supplier for reliability data. Long-life modules save money and lower downtime.
Calibration Methods
Calibration keeps your thermal camera accurate. You should use the right method for your job. Here are some common ways to calibrate your module:
| Calibration Method | Description |
|---|---|
| Using a Blackbody Calibrator | A device that gives a steady, known temperature. It helps set a reference for calibration. |
| Emissivity Adjustment | You can change the emissivity settings on your camera. This helps you get correct readings for different surfaces. |
| Software Calibration Tools | Calibration software guides you step by step. It makes the process easier and faster. |
You can use a blackbody calibrator to set a starting point. Adjusting emissivity helps when you measure metals, plastics, or skin. Software tools show you each step and help you avoid mistakes.
Accuracy Checks
You should check your camera’s accuracy often. Start by comparing the camera’s readings with a trusted thermometer or a blackbody source. If you see big differences, recalibrate your module. Many OEMs check accuracy before shipping products. You can also set up regular checks in your own lab. Look for changes in readings over time. If your camera works in tough places, check it more often.
- Use a reference thermometer for quick checks.
- Run calibration routines after moving or dropping the device.
- Keep a log of accuracy checks to find problems early.
🛠️ Regular accuracy checks help you find issues before they cause trouble. Good calibration means safer and better results.
Software Support
SDKs & APIs
You need good software tools for your thermal camera module. Many vendors give you Software Development Kits (SDKs) and Application Programming Interfaces (APIs). These help you make custom features for your camera. You can use these tools to control the camera and take pictures. They also help you work with thermal data. Some SDKs let you do everything. Others just let you take quick snapshots.
| SDK/API | Description |
|---|---|
| RealWear Thermal Camera SDK | Lets you use all features of the thermal camera. You need to contact the vendor to get access. |
| RealWear Intents | Lets you take snapshots easily. You do not need full SDK integration. |
You might see support for hardware interfaces like Parallel CMOS, MiPi-CSI-2, and CameraLink. These options help you connect the module to your system. Some companies, like Jenoptik, give you USB samples. They also help you talk to developers and engineers. This support helps you fix problems fast and keeps your project moving.
Tip: Pick a module with an SDK or API that fits your team’s skills and your project’s needs.
Updates
You want your thermal camera module to stay up to date. Good vendors give updates for their SDKs and APIs. Updates fix bugs and add new features. They also make your software safer. Regular updates help your product last longer and work better. Some modules, like the Teledyne FLIR BOSON series, have built-in algorithms and software you can change. You can add new functions when you need them.
Updating your software helps you avoid problems and get the best results from your camera.
Documentation
Clear guides make your job easier. You need instructions, CAD data, and videos to help you use your thermal camera module. Good documentation shows you how to connect the module and use the SDK. It also helps you fix common problems.
| Resource Type | Description |
|---|---|
| SDKs | Tools for making apps and software. |
| Design Documentation | Guides for adding thermal camera modules to your design. |
| CAD Data | 3D models and specs for CAD software. |
| Developer Support | Help from a support team and forums. |
| Video Tutorials | Videos to help you with your project. |
Some modules, like the Teledyne FLIR BOSON+, come with .STEP files and PDF guides. These help you add the module to your design. When you have good resources, you finish your project faster and make fewer mistakes.
Good guides and support help you build better products and fix problems quickly.
- Strong stainless steel cases
- IP68 keeps out dust and water
- Explosion-proof for risky places
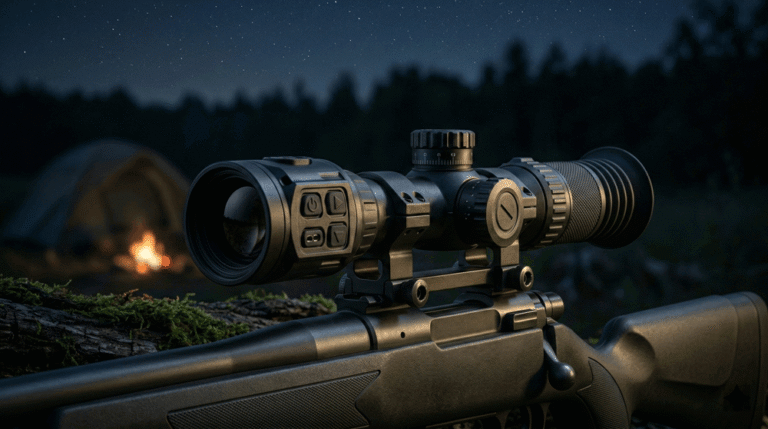
Harsh Conditions
Thermal camera modules help you work in dangerous areas. Intrinsically safe designs stop sparks and lower energy output. You can check electrical systems without danger. Non-contact thermal imaging lets you find hot spots and gas leaks by seeing temperature changes. Advanced imaging gives you live heat maps. You do not need to touch hot or risky equipment.
- Intrinsically safe design stops fires in explosive places
- Non-contact imaging finds hot spots and leaks
- Real-time thermal imaging for quick checks
Note: Pick a module with strong features if you work in tough or dangerous places. This keeps your team safe and your system working.
Compliance & Certifications
Regulatory Needs
You have to check certifications before selling in other countries. Every country has its own rules for products. These rules keep people safe and make sure things work right. The US, Canada, Europe, the UK, and Australia all have different certifications. The table shows what each place needs:
| Market | Required Certifications |
|---|---|
| US & Canada | UL/ULC certification for power supplies (optional), FCC certification for radio components |
| EU | CE Safety certification for cameras, batteries, and chargers; RED certification for radio components |
| UK | UK |
| Australia | RCM Safety Certification (similar to CE & UK |
| Worldwide | CB certification for radio and safety testing |
Tip: Always look up the newest rules for your market. This helps you avoid waiting and spending more money.
Industry Standards
Industry standards guide how you build and approve your thermal camera module. These rules keep users safe and make your product stronger. You must follow NDAA and ITAR rules for some jobs. NDAA checks if your product is safe for the country. ITAR controls sending defense technology to other places. The table explains how these rules change your design:
| Industry Standard | Impact on Design and Approval |
|---|---|
| NDAA | Makes sure products are safe for the country, so you may need to change your design for better safety and security. |
| ITAR | Controls sending defense technology to other countries, so you have to follow special steps to get approval. |
Following these rules helps customers trust you and keeps you legal.
Market Access
You need the right certifications and standards to sell in new places. Without them, you cannot sell your thermal camera module in many countries. Certifications like CE, FCC, and CB help you sell in more places. They show buyers your product is safe and tested. You can get more customers and bigger jobs.
- Certifications let you sell in more countries.
- Standards help your product stand out.
- Following rules keeps your business safe and protects your name.
📋 Make a list of needed certifications before you sell. This keeps your business safe and ready to grow.
Cost & Supply Chain
Total Cost
You need to look beyond the price tag when you choose a thermal camera module. The total cost of ownership (TCO) covers every expense you face during the life of the product. This includes the first purchase, maintenance, battery changes, training, and upgrades. If you plan your budget with TCO in mind, you avoid surprises later. You can compare different modules by looking at their long-term costs, not just what you pay upfront.
- Initial purchase price
- Maintenance and repairs
- Battery replacement
- Training for your team
- Software or hardware upgrades
Tip: Always ask vendors for a breakdown of TCO. This helps you see which module saves money over time.
Lead Time
Lead time tells you how long you wait for your thermal camera module to arrive. Short lead times help you start your project faster. Long lead times can slow down your work and cost you money. You should ask suppliers about their average delivery times. Some vendors keep modules in stock, while others build them after you order.
| Supplier Type | Typical Lead Time |
|---|---|
| In-stock Vendor | 2–4 weeks |
| Build-to-order | 6–12 weeks |
| Custom Solutions | 12+ weeks |
If you need modules quickly, pick a supplier with short lead times. This keeps your project on track.
Supplier Comparison
You should compare suppliers before you buy. Look at price, lead time, support, and supply chain stability. A strong supply chain means you get your modules on time, even when demand is high. Reliable suppliers help you avoid delays and keep your business running.
- Price and TCO
- Lead time and delivery reliability
- Technical support and warranty
- Supply chain stability
🛠️ Make a list of what matters most to you. Compare suppliers using these points. This helps you choose the best partner for your needs.
Vendor Support & Warranty
Technical Help
You need good technical help when using thermal camera modules. Good vendors answer your questions quickly. You can ask about setup, software, or fixing problems. Some vendors let you talk to engineers who know the product well. You might get help by phone, email, or online chat. Fast answers help you finish your project on time. Training classes show you how to use the module the right way. You can also find step-by-step guides and videos.
🛠️ Tip: Pick a vendor with easy-to-reach support and clear training. This helps you make fewer mistakes and saves time.
Warranty Terms
Warranty terms help protect your money. You should check how long the warranty lasts and what it covers. Some vendors will replace or refund your module if it breaks. Others offer free repairs or paid repair choices. Some even let you fix your module for life, even after the warranty ends. The table below shows what two top vendors give you:
| Vendor | Warranty Duration | After-Sales Support |
|---|---|---|
| ULIRVISION | 2 Years | Replacement or refund service, free warranty service, paid repair service, lifelong repair guarantee. |
| Seek Thermal | 1 Year | Repair or replacement for defects, 30-day return policy, limited warranty with specific exclusions. |
Read the warranty policy before you buy anything. Look for what is covered and what is not. A longer warranty means you worry less.
Vendor Reliability
Vendor reliability is important for your business. You want a partner who keeps promises and stands by their products. Check reviews and ask other OEMs what they think. Good vendors answer support requests fast and honor warranty claims. They keep spare parts ready and offer repair services. You can count on them if something goes wrong.
- Pick vendors with a strong reputation.
- Ask about service plans and how fast they respond.
- Choose partners who help you after you buy.
📞 Note: Good vendor support and strong warranty terms help you avoid delays and keep your products working well.
OEM Buyer’s Guide to Thermal Camera Modules: Checklist
Quick Reference
This checklist helps you compare thermal camera modules fast. The OEM Buyer’s Guide to Thermal Camera Modules shows what is most important. Here is an easy table for you:
| Factor | Checkpoint |
|---|---|
| Resolution & Sensitivity | Meets your image needs |
| Interface Options | Matches your system |
| Size & Form Factor | Fits your design |
| Power Needs | Works with your power source |
| Environmental Robustness | Handles your work conditions |
| Calibration & Accuracy | Delivers reliable results |
| Software Support | Offers SDKs and good guides |
| Compliance & Certifications | Passes all required tests |
| Cost & Supply Chain | Fits your budget and timeline |
| Vendor Support & Warranty | Gives strong after-sales help |
📝 Use this table to help you check each module quickly.
Evaluation Steps
Follow these steps from the OEM Buyer’s Guide to pick the right module:
- Write down what you need for your job.
- Match your needs to the checklist factors.
- Get information from vendors about each module.
- Give each module a score for how well it fits.
- Look at the scores and choose the best one.
Tip: Ask vendors for more details or a demo if you want extra help.
Key Takeaways
The OEM Buyer’s Guide to Thermal Camera Modules helps you stay on track. You can avoid problems by checking every factor. You save time and money by using these steps. Always use the checklist before you buy anything. This helps you get the best module for your project.
If you follow simple steps, you can pick better thermal camera modules. Use the OEM Buyer’s Guide and check every important factor first. This helps you stop mistakes and get good results. Ask vendors questions and look at different modules. Try testing a few before you choose. Careful planning helps you build strong products and have less trouble.
FAQ
What is NETD and why does it matter?
NETD means Noise Equivalent Temperature Difference. It tells you how small a temperature change your camera can see. If the NETD is lower, the camera is more sensitive. You will get clearer pictures. You can find tiny temperature differences more easily.
How do I know which interface to choose?
First, look at the ports on your system. USB works for most devices and is simple to use. GigE is good if you need to send data far. MIPI is best for built-in systems. Pick the interface that matches your device for easy setup.
Can I use thermal camera modules outdoors?
Yes, you can use many thermal camera modules outside. Choose models with strong cases and IP ratings like IP68. These features keep your camera safe from dust, water, and bad weather.
How often should I calibrate my thermal camera module?
Check calibration every few months or after you move the device. Regular calibration helps keep your readings correct. Use a blackbody calibrator or a trusted thermometer for the best results.
What certifications do I need for global sales?
You need certifications like CE for Europe, FCC for the US, and RCM for Australia. Always check each country’s rules before you sell. Certifications help you sell in more places and show your product is safe.