Choosing a thermal imaging camera for construction is no longer a “nice-to-have” decision. On most projects, an infrared camera is now a practical way to avoid warranty disputes, reduce callbacks, and prove that the building envelope and services perform as designed.
Table of Contents
ToggleStandards such as ISO 6781-1 and ASTM C1060/C1153/E1186 formally describe how infrared thermography should be used to find heat, air and moisture irregularities, missing insulation, wet roofing, and air leaks in building envelopes. Many energy-audit guidelines from government agencies also recommend pairing blower-door tests with infrared camera for construction scans to locate defects quickly.
This article is written for:
-
- Developers and owners who care about risk and lifetime cost,
-
- General contractors and specialty subs who must pass rigorous QA,
-
- Consultants and commissioning agents,
-
- OEM/ODM buyers who want to build or private-label thermal imaging camera construction products with a China-based manufacturer.
We’ll cover:
-
- Why thermography is now central to construction QA and warranty
-
- The basics of building thermography and relevant standards
-
- Key specs you should demand in a thermal imaging camera for construction
-
- Application scenarios before hand-over and during warranty
-
- How to choose a China OEM/ODM partner for infrared construction cameras
-
- Where Gemin Optics can fit into your product or QA strategy
1. Why Construction QA Needs Thermal Imaging
1.1 The defects that are hardest to see cause the biggest pain
Most high-cost construction disputes and warranty claims are not about paint color—they’re about the building envelope and hidden services. Technical articles on building thermography and roofing standards highlight recurring issues:
-
- Water leaks and trapped moisture in walls and roofs
-
- Missing or poorly installed insulation
-
- Air leakage paths through envelope and service penetrations
-
- Wet insulation in roofing systems
-
- Thermal bridges at slab edges, balconies, and structural frames
These problems often remain invisible at hand-over. They only show up later as mold, cracked finishes, condensation, cold spots, or high energy bills—long after scaffolds are gone and access is expensive.
1.2 Traditional QA tools have limits
Conventional tools—visual inspections, random core cuts, moisture meters, tap tests—are still essential. But they are:
-
- Slow: you only sample a small percentage of surfaces.
-
- Intrusive: openings must be patched; owners hate seeing new buildings cut open.
-
- Reactive: often used after occupants report issues.
An infrared camera for construction lets you scan large surfaces non-destructively and decide where to open, where to test, and what to fix—before occupants move in.
1.3 Thermography is now standardized, not experimental
Building thermography is not guesswork. Several standards now describe how to do it correctly:
-
- ISO 6781-1:2023 sets requirements and methods for using infrared thermography to detect heat, air and moisture irregularities in buildings.
-
- ASTM C1060 is a standard practice for using infrared imaging to inspect insulation in walls, roofs and floors in framed buildings, identifying missing or inadequate insulation.
-
- ASTM C1153 describes how to use infrared imaging at night to find wet insulation in roofing systems.
-
- ASTM E1186 covers standardized techniques, including infrared scanning, for detecting air-leakage sites in building envelopes and air barriers.
Energy agencies such as the U.S. Department of Energy explicitly mention thermographic scans as a normal part of professional energy assessments.
If your QA, commissioning or warranty program doesn’t use a thermal imaging camera for construction, it’s simply missing one of the most efficient ways to see hidden risk.
2. Thermal Imaging Camera for Construction: The Basics
2.1 What exactly does an infrared camera “see”?
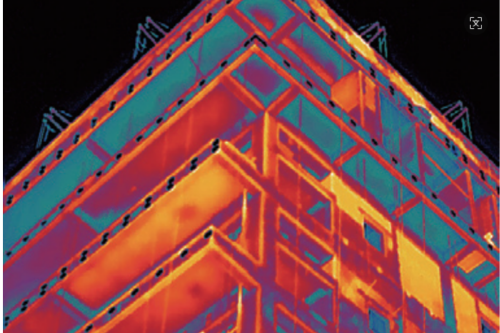
A thermal imaging camera doesn’t look at light; it measures infrared radiation emitted by surfaces:
-
- Most building thermography uses uncooled microbolometer sensors sensitive to long-wave infrared (LWIR) around 8–14 µm.
-
- Each pixel records the intensity of radiation; firmware converts this into a temperature value for that point.
-
- The camera displays a thermogram where colors represent relative temperatures.
For construction QA, you’re usually interested in temperature patterns, not individual degrees—patterns that imply:
-
- Heat loss through gaps in insulation
-
- Cool signatures from evaporating moisture
-
- Warm “islands” of wet roofing that store heat
-
- Anomalies in underfloor heating or embedded pipes
2.2 How building thermography is normally performed
Using a thermal imaging camera construction-grade device is not just “point and shoot.” Good practice (aligned with ISO 6781-1 and ASTM standards) typically includes:
-
- Establishing a sufficient temperature difference between inside and outside (often ≥10 °C for insulation inspections).
-
- Controlling or at least noting factors such as solar loading, wind and precipitation.
-
- For air-leakage detection, using blower-door pressurization or depressurization while scanning surfaces (described in ASTM E1186).
-
- Combining thermal images with moisture readings, core cuts, or other tests to confirm interpretations.
A thermal imaging camera for construction must therefore be accurate, sensitive, and rugged enough to operate in these controlled but real-world conditions.
2.3 Why not just use a cheap gadget?
Low-cost consumer-grade cameras are now widely available. They have their place, but for professional QA they often fall short:
-
- Limited resolution makes it hard to read details on tall façades or large roofs.
-
- Higher noise (poor NETD) masks subtle patterns from moisture or small voids.
-
- Questionable calibration and no documentation to support expert reports.
If you’re signing off on construction quality or providing warranty, you need an infrared camera for construction that can stand behind your reports and, if necessary, support expert testimony.
3. Key Specs When Choosing a Thermal Imaging Camera for Construction
Let’s turn to the practical side: what should you look for in a thermal imaging camera for construction?
3.1 Detector resolution and thermal sensitivity (NETD)
Resolution determines how much detail you can see at a given distance:
-
- 160 × 120 – acceptable for basic interior checks and small projects.
-
- 256 × 192 or 320 × 240 – common mid-range; good for many envelope and interior tasks.
-
- 384 × 288 – strong choice for core QA teams; good façade detail from moderate distances.
-
- 640 × 480 / 640 × 512 – expert-level; ideal for high-rise façades, long standoffs, and forensic work.
The right choice depends on:
-
- Building height and access (ground, lift, drone).
-
- The smallest defect you need to resolve (e.g., insulation board joints, bracket zones).
NETD (Noise-Equivalent Temperature Difference) describes how small a temperature difference the camera can distinguish:
-
- For construction QA, aim for NETD ≤ 60 mK as a minimum.
-
- For demanding moisture and air-leakage work, NETD ≤ 40–50 mK is better.
Higher sensitivity helps you see faint patterns when indoor–outdoor temperature differences are small or when environmental noise (wind, solar gain) is present—conditions often discussed in building-envelope thermography guidance.
3.2 Field of view, optics and working distances
Your thermal imaging camera construction platform should match how your team works:
-
- Wide-angle (40–50° HFOV)
-
- Interiors, small rooms, balcony interfaces, tight spaces.
-
- Wide-angle (40–50° HFOV)
-
- Standard (24–32° HFOV)
-
- General façade work from ground or lift; balance between coverage and detail.
-
- Standard (24–32° HFOV)
-
- Telephoto (12–15° HFOV)
-
- High façades, roofs, and details seen from adjacent buildings or streets.
-
- Telephoto (12–15° HFOV)
For OEM/ODM buyers, consider a platform with interchangeable lenses or at least different SKUs built on the same core. This lets you serve:
-
- Interior QA teams (wide lens)
-
- Façade and roof specialists (standard + telephoto)
3.3 Temperature range and accuracy
Construction QA rarely needs extreme temperature ranges. Typically:
-
- Lower limit around −20 °C (cold climates, pre-dawn façade and roof scans).
-
- Upper limit 120–150 °C, enough for sun-heated roofs, mechanical rooms and underfloor heating manifolds.
Standards such as ASTM C1060 and C1153 focus more on qualitative patterns and environmental conditions than on absolute temperature accuracy, but your camera should still offer:
-
- Accuracy of about ±2 °C or ±2% of reading (whichever is greater),
-
- Documented calibration procedures and recommended recalibration intervals.
3.4 Ruggedness, IP rating and site ergonomics
Construction sites are hard on instruments. For a thermal imaging camera for construction, look for:
-
- IP54 or better ingress protection for dust and splashes (IEC 60529).
-
- Drop testing from 1–2 m onto hard surfaces.
-
- Operating temperature range suitable for cold mornings and hot roofs (around −10 to +50 °C).
-
- Sunlight-readable screen, large physical buttons, glove-friendly controls.
Ergonomic basics:
-
- Pistol-grip design for one-hand operation on ladders and lifts.
-
- Reasonable weight for long scanning sessions.
-
- At least one full shift of battery life; hot-swappable batteries are ideal.
3.5 Connectivity, data structure and reporting
A modern infrared camera for construction is part of a data pipeline, not a stand-alone gadget. Consider:
-
- Wi-Fi or Bluetooth to pair with tablets and phones, upload images, and sync to cloud QA systems.
-
- Radiometric file formats that preserve temperature data per pixel, plus standard image exports.
-
- On-camera annotation (voice notes, markers) and QR/BIM tag scanning.
-
- SDK or API access so you can integrate with your own inspection or commissioning software.
Inspection reports that include thermal imagery have been shown to increase the likelihood that building owners act on retrofit or repair recommendations, because they communicate problems visually.
3.6 Alignment with building-thermography standards
When you’re choosing or designing a thermal imaging camera construction product, ask your supplier:
-
- Has the system been used under ISO 6781-1 style workflows (detecting heat, air and moisture irregularities)?
-
- Is it suitable for insulation inspections per ASTM C1060, roof moisture per ASTM C1153, and air-leakage scans per ASTM E1186?
You don’t need the camera itself “certified” to those standards, but its performance and documentation should support professional work under them.
4. Typical Construction QA Use Cases for Thermal Imaging
4.1 Insulation quality in walls, roofs and floors
ASTM C1060 describes how infrared imaging can be used to check insulation installations in framed building cavities. It guides practitioners on how to identify cavities where insulation is missing or inadequate.
With a thermal imaging camera for construction, you can:
-
- Walk interior walls and ceilings to find cold or hot patterns that reveal missing or slumped insulation.
-
- Identify thermal bridges at studs, joists and steel framing.
-
- Verify that insulation has been installed uniformly before finishes are closed, or at least before final hand-over.
This is especially valuable for projects that must meet energy codes or performance labels, where poorly installed insulation can cause both comfort issues and compliance failures.
4.2 Roof moisture and wet insulation
ASTM C1153 lays out a practice for using infrared imaging at night to locate wet insulation in roofing systems.
Using a construction thermal camera you can:
-
- Scan flat or low-slope roofs after a sunny day; wet areas retain heat longer and show up as warm zones in evening thermograms.
-
- Distinguish between discrete patches of wet insulation and broader patterns.
-
- Target core cuts or repairs, instead of guessing.
Doing this before hand-over lets you push for corrective work while access is still available and contractual leverage is strong.
4.3 Air leakage in building envelopes
ASTM E1186 describes several practices for finding air-leakage sites in building envelopes, including infrared scanning combined with pressure differentials established by fans.
Typical workflow:
-
- Use a blower door to pressurize or depressurize the building.
-
- Walk interior or exterior surfaces with an infrared camera for construction.
-
- Look for streaks or patterns showing warm air leaking out (or cold air leaking in).
-
- Document leakage paths at window interfaces, doors, top-floor ceilings, penetrations, and junctions.
This is becoming a standard part of envelope commissioning and air-tightness testing, especially for high-performance and code-driven projects.
4.4 Bathrooms, balconies and water-proofing
Bathrooms, balconies and podium decks are classic leak locations. A thermal imaging camera construction-grade tool helps you:
-
- Track moisture spreads under tile or screed after controlled water tests.
-
- Identify cold damp zones where water has migrated from wet rooms into adjacent walls.
-
- Check balcony edges and upstands for moisture and thermal bridges.
Thermal images plus moisture readings form persuasive evidence in both QA discussions and later warranty disputes.
4.5 Embedded services and underfloor heating
Thermography is widely used to:
-
- Map underfloor heating circuits and verify full coverage.
-
- Confirm that all loops are connected and actively carrying warm fluid.
-
- Locate embedded pipes and conduits before drilling or coring.
This helps avoid expensive rework and supports clear as-built documentation.
4.6 Energy audits and hand-over reports
Guidance from the U.S. Department of Energy explains that professional home or building energy assessments often include blower-door testing and thermographic scans as part of a comprehensive audit, because they help locate heat loss and envelope defects efficiently.
For new construction or major refurbishments, including thermal images in hand-over or commissioning reports:
-
- Demonstrates that you have checked key envelope and HVAC performance areas.
-
- Supports future energy-use guarantees or performance-based contracts.
-
- Provides a baseline for later comparison if problems arise during warranty.
5. Practical Selection Checklist for Thermal Imaging Cameras in Construction QA
When you’re evaluating a thermal imaging camera for construction, this condensed checklist helps frame the conversation with vendors or your internal engineering team.
5.1 Quick specification matrix
| Decision Area | Recommended Baseline for Construction QA |
|---|---|
| Resolution | 320×240 or 384×288 for core QA; 640×480+ for high-rise and forensic work |
| NETD (sensitivity) | ≤60 mK baseline; ≤40–50 mK for subtle moisture and air-leakage tasks |
| Temperature range | Roughly −20 to 120/150 °C |
| FOV / optics | Wide lens (≈45–50°) for interiors; standard (≈24–32°) for façades; optional telephoto for tall buildings |
| Ingress Protection | IP54 or better; IP65 for harsher sites |
| Data & connectivity | Wi-Fi/Bluetooth, radiometric export, tagging and SDK support |
| Standards alignment | Suitable for workflows based on ISO 6781-1, ASTM C1060, C1153, E1186 |
5.2 Questions to ask vendors or OEM suppliers
-
- “What detector resolutions and NETD options do you offer specifically for thermal imaging camera construction use?”
-
- “Can you show example thermograms of insulation defects, wet roofs and air-leakage tests?”
-
- “How is the camera calibrated and how often should it be recalibrated?”
-
- “What radiometric file formats do you support, and is there an SDK?”
-
- “Has this platform been used in projects that followed ISO 6781-1 or ASTM C1060/C1153/E1186 guidance?”
If you’re talking to a China thermal imaging camera for construction OEM/ODM supplier, also ask about:
-
- Minimum order quantities (MOQs) and lead times.
-
- Options for custom housings, branding and firmware.
-
- Support for your own QA/reporting software and cloud systems.
6. Choosing a China OEM/ODM Supplier for Construction Thermal Cameras
If you plan to build your own brand of infrared camera for construction, you’ll likely work with a China manufacturer or OEM/ODM factory. Selecting the right partner is as important as the spec sheet.
6.1 Module and platform strategy
A strong OEM partner should offer thermal imaging modules that can be used across several products, not just a single finished camera. For example, you can base both:
-
- A compact, entry-level construction camera for foremen and site supervisors, and
-
- A higher-spec QA model for consultants
on the same imaging core.
Using modular thermal camera modules lets you control the housing, UI and software, while your supplier focuses on sensor, optics and calibration.
6.2 Calibration, QC and documentation
Ask potential partners how they:
-
- Calibrate each module or device against traceable blackbody sources.
-
- Verify NETD and resolution performance across production batches.
-
- Document calibration and environmental test results (temperature cycling, humidity, vibration, IP testing) in line with general building and IEC practices.
You’ll need this documentation to support your own QA program and, in some jurisdictions, to defend expert reports.
6.3 Mechanical and environmental design
For thermal imaging camera construction products, your China manufacturer should be comfortable with:
-
- Drop-resistant housings, robust seals and IP-rated designs.
-
- Displays and optics optimized for outdoor use.
-
- Optional accessories: sunshades, tripod mounts, lens caps, protective bumpers.
This is where close collaboration between your engineers and the factory’s mechanical team matters.
6.4 Firmware, SDKs and integration
The real value of a thermal imaging camera for construction is in how its data flows into your systems. Check whether the OEM/ODM supplier can:
-
- Provide firmware that supports emissivity presets for common construction materials.
-
- Offer an SDK (C/C++, .NET, Python or similar) for reading radiometric data and camera control.
-
- Assist your developers in integrating cameras with mobile apps, QA databases, and BIM tools.
This avoids treating the camera as a “black box” and lets you build differentiated workflows and services.
7. Gemin Optics as a Thermal Imaging Camera Construction Partner
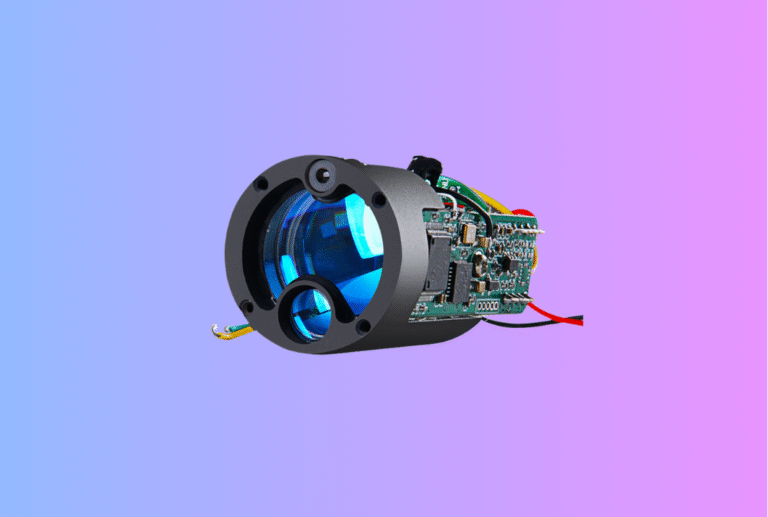
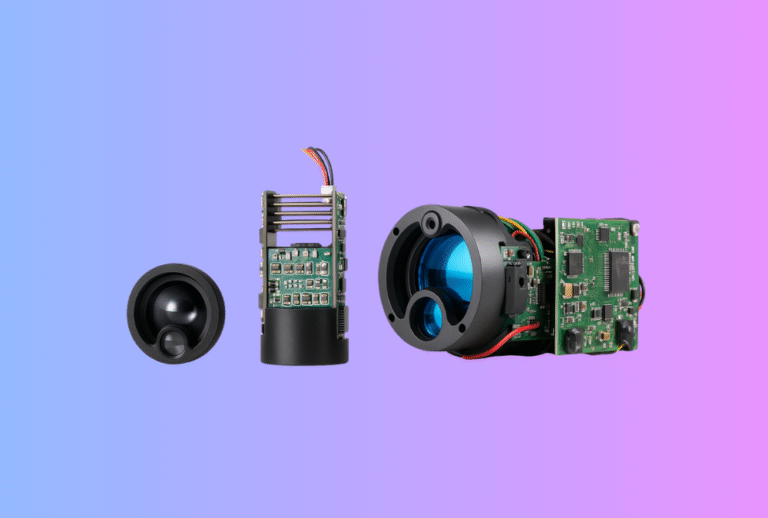
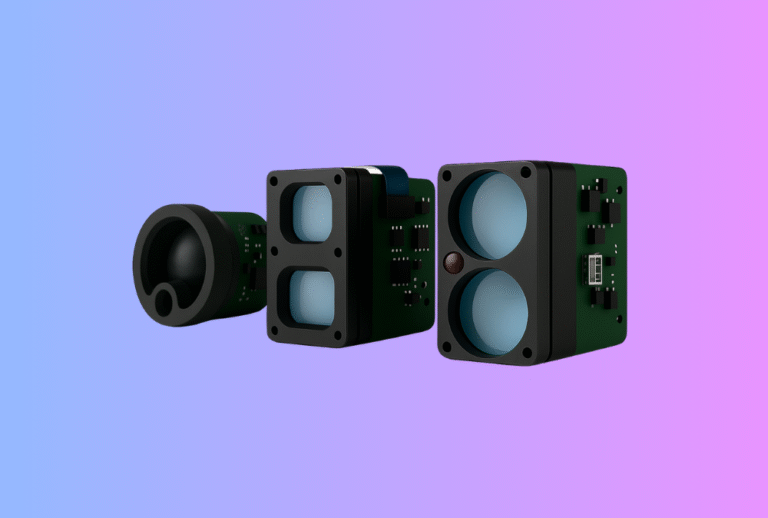
Gemin Optics is a China-based manufacturer focused on thermal imaging modules, laser rangefinder modules, and handheld thermal imagers for industrial and B2B markets. For construction QA, Gemin Optics can support:
7.1 Module-based construction camera designs
Using configurable thermal imaging modules as building blocks, you can:
-
- Design your own infrared camera for construction with resolutions from entry to expert level.
-
- Choose optics tailored to envelope work (wide and standard FOVs) and optional telephoto for high façades.
-
- Embed modules into rugged housings with your branding and ergonomics.
7.2 Ready-to-brand handheld industrial imagers
If time to market matters, you can start from Gemin Optics’ industrial handheld thermal imagers and adapt them for building thermography:
-
- Tune palettes, measurement ranges and presets for insulation, moisture and air-leakage diagnostics.
-
- Add your own overlays, project templates and reporting styles.
-
- Offer a family of thermal imaging camera construction tools spanning basic, mid-range and expert tiers.
7.3 OEM/ODM collaboration
As an OEM/ODM partner, Gemin Optics can:
-
- Work with you on specification, optics, calibration and environmental testing.
-
- Support integration with your QA software and cloud platforms via SDKs and documentation.
-
- Plan hardware lifecycles so your product line remains stable and supportable over many years.
For B2B brands, distributors and system integrators, this means you can create differentiated offerings in the construction QA space rather than reselling generic off-the-shelf cameras.
8. Work with a China Thermal Imaging Camera for Construction Manufacturer You Can Trust
A well-chosen thermal imaging camera for construction can:
-
- Shorten punch lists and reduce callbacks,
-
- Catch leaks, wet insulation and air-leakage paths before occupants move in,
-
- Support commissioning and warranty documentation aligned with ISO 6781-1 and ASTM C1060/C1153/E1186,
-
- Provide persuasive visual evidence in QA discussions and, if needed, expert reports.
Whether you’re a contractor, consultant, or OEM/ODM brand, the next step is to align your camera choices with real project risks and your own service model.
Gemin Optics can help you:
-
- Map your QA workflows to concrete imaging requirements,
-
- Select or design infrared camera for construction platforms that fit your budget and brand,
-
- Build a long-term roadmap for thermal imaging camera construction products that serve both construction and broader industrial markets.
If you’re planning a new construction QA solution or looking to add thermal imaging to your portfolio, you can:
-
- Contact the Gemin Optics team to discuss your thermal imaging camera for construction project and OEM/ODM requirements.
-
- Share your target standards, use cases and volume expectations so we can recommend module or device platforms that make sense for you.