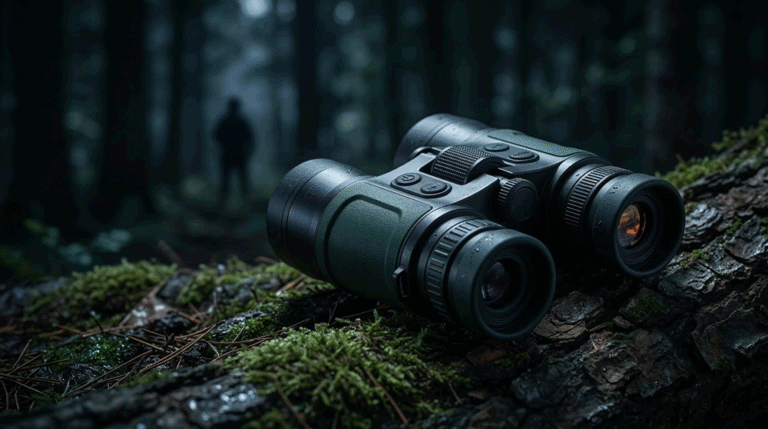
For professional guides and outfitters, handheld thermal binoculars are no longer a luxury gadget. They are the tool that lets you find game faster, keep clients safe and make the most of every hour of low light. But the binoculars that work for a weekend hobbyist often fail in the hands of a guide who glasses for eight hours straight, in cold wind, from vehicles, quads and high seats.
Table of Contents
ToggleIf you are planning your own branded line with a handheld thermal binoculars China manufacturer or OEM supplier, you need a deeper framework than “higher resolution is better”. This guide walks through optics, ergonomics, power, UI and portfolio positioning so you can brief a factory, build SKUs your dealers actually want, and keep your clients happy season after season.
In this guide you will learn
- How guides and outfitters actually use handheld thermal binoculars through a full night
- Which sensor, lens and magnification combinations really matter in the field
- How to design ergonomics, weight and controls for all-night glassing
- How to spec power, durability and environmental protection for hard commercial use
- How to position handheld thermal binoculars among monoculars and rifle scopes in your line
- What to ask from a handheld thermal binoculars OEM/ODM factory or China manufacturer
1. Why guides and outfitters need a different binocular spec
Most consumer-focused handheld thermal binoculars are designed for weekend hunters or gadget buyers. A professional guide or outfitter has very different patterns:
- They glass for many hours per night, not 20 minutes at dawn and dusk.
- They often hold binoculars in one position for long stretches while talking to clients, driving, or coordinating over radio.
- They use thermal primarily as a detection and confirmation tool, not just a “wow effect”.
- They must manage fatigue, neck strain and eye strain across an entire season, not just a single trip.
From a B2B point of view, this changes what a good product looks like:
- Your handheld thermal binoculars OEM platforms must balance resolution with weight and power, because a 25% heavier device can be the difference between happy and exhausted guides.
- You need features that support guiding workflow: sharing what you see with clients, marking locations, and coordinating with shooters using thermal rifle scopes.
- As a brand, you must think in terms of fleet deployment—several units per lodge or outfitter team—so reliability and serviceability matter more than chasing the highest spec sheet.
For a China factory or manufacturer designing handheld thermal binoculars for OEM customers, understanding these patterns is the key to building products that guides reorder instead of replacing with competitors.
2. Map real guide & outfitter use cases first
Before writing any specs, write scenarios. Most guiding operations use handheld thermal binoculars in four recurring ways:
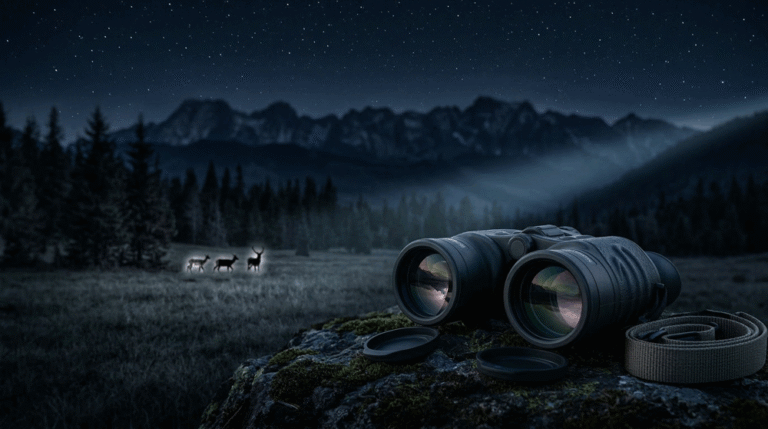
2.1 Night scouting and pre-hunt reconnaissance
Guides sweep large valleys, crop fields or bush lines for movement:
- Long continuous scans at medium distances (300–800 m).
- Need wide field of view and enough magnification to classify targets.
- Often done from a vehicle or ATV, sometimes standing behind a tripod.
2.2 On-hunt spotting and client management
During an actual hunt, the guide may:
- Scan ahead while the client walks or stalks behind.
- Confirm species, group size and safe backstop before telling the shooter to get ready.
- Hand the binoculars to the client for a quick look.
2.3 Recovery, tracking and ethics
After a shot, handheld thermal binoculars help:
- Confirm impact location and reaction.
- Find downed game or spot wounded animals in brush.
- Maintain ethical standards that clients expect from professional operations.
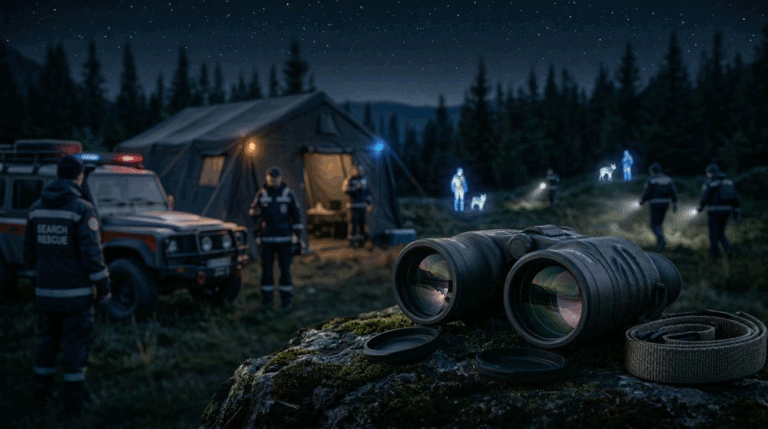
2.4 Camp security and predator monitoring
Some outfitters also use thermal binoculars to:
- Keep an eye on predators near camp.
- Monitor bait sites or access roads.
- Support ranch, game farm or conservation operations.
Each of these scenarios has slightly different demands on optics, ergonomics and battery life. If you’re specifying a line with a handheld thermal binoculars OEM supplier, insist on testing prototypes across at least three of them before finalizing.
3. Optics architecture: sensors, lenses and magnification that actually work
When you talk to a handheld thermal binoculars China manufacturer, they will usually start with sensor resolution and lens options. Your job is to translate field use into a realistic combination.
3.1 Selecting sensor resolution and pixel pitch
For professional guide work, three resolution classes dominate:
- Entry pro: 256×192 sensors – good for shorter ranges, budget fleets, or dense forest.
- Workhorse: 384×288 sensors – sweet spot for many guides and outfitters.
- Premium: 640×512 sensors – for open-country operations or high-end lodges.
Higher resolution helps with target identification at distance, but it increases cost, power consumption and sometimes weight. Pixel pitch (e.g. 12 µm vs 17 µm) also influences lens size and FOV.
A practical approach:
- Make 384×288 your main workhorse platform for handheld thermal binoculars OEM designs.
- Offer 256×192 binoculars as fleet tools for smaller operations or rental fleets.
- Add 640×512 as a premium option for outfitters who guide in wide-open terrain or want a flagship model.
3.2 Lens, field of view and magnification
Guides value both situational awareness and classification. Too narrow a FOV and they constantly lose context; too wide, and the client keeps asking, “Is that a boar or a cow?”
A simple rule of thumb:
- Wide / general-purpose handheld thermal binoculars:
- HFOV around 15–18°, base magnification 2–3×
- Ideal for mixed terrain, forests, rolling farmland.
- Open-country / long-range binoculars:
- HFOV around 8–12°, base magnification 3–4×
- Better for mountains, large fields, and coastal areas.
Digital zoom can help, but guides quickly learn that high digital zoom introduces noise and is more for quick checks than sustained viewing. If you’re working with a handheld thermal binoculars factory, ask for field test images at different magnifications to see how usable they are at realistic distances.
3.3 Eye pieces, eye relief and interpupillary adjustment
Unlike monoculars, handheld thermal binoculars must deal with two eyes and different face shapes:
- Interpupillary distance (IPD) adjustment:
- Essential for comfort; poor IPD range makes some users fight double images.
- Eye relief:
- Needs to accommodate glasses and hats; too short, and users keep bumping their brow; too long, and they struggle to find the image.
- Diopter adjustment:
- Each barrel may need individual focus adjustments to match eyesight differences.
These are details many OEM manufacturers overlook, but for guides and outfitters they directly affect fatigue and eye strain across a season.
4. Ergonomics: all-night comfort and control
Optics only matter if guides can actually hold and operate the binoculars for hours.
4.1 Weight and balance
Professional guides are extremely sensitive to weight. They already carry daypacks, rifles, radios, water, first aid and sometimes a client’s gear. Your handheld thermal binoculars should not feel like an anchor.
A practical target range:
- 1–1.2 kg (2.2–2.6 lb) for mainstream binoculars with mid-size lenses.
- <1 kg for compact models aimed at mixed scouting / stalking.
Weight is not just a number; balance matters too:
- If the center of gravity sits close to the hands, the binoculars feel lighter.
- Front-heavy designs increase wrist fatigue when glassing from a standing position.
When working with a handheld thermal binoculars OEM/ODM factory, ask them to prototype dummy housings with real batteries and lenses so you can test balance early, before committing to tooling.
4.2 Controls and UI for gloved hands
Guides and outfitters often operate in cold or wet conditions, with gloves on. Your design should:
- Use large, raised buttons with clear separation so they can be felt through gloves.
- Keep critical functions (power, zoom, palette, record, laser rangefinder if present) on dedicated buttons, not nested menus.
- Support one-handed operation where possible, so the other hand can hold a rifle, stick or vehicle.
Think in terms of gross motor movements: big presses and simple long/short press logic, rather than multi-level clicks.
4.3 Carrying systems: harnesses, straps and mounts
Handheld thermal binoculars used all night need a carry system that:
- Keeps the device stable and protected when walking or driving.
- Allows rapid deployment for sudden spotting.
- Works with conventional daytime glass—many guides run both.
Examples:
- Chest harness adapters that let thermal binoculars hang in a central “ready” position.
- Quick-detach lanyard systems that connect to the binocular body without interfering with controls.
- Tripod or monopod mounts for long observation on hilltops or at bait sites.
If your brand also offers thermal monoculars and thermal rifle scopes, it’s smart to design shared accessories—the same batteries, chargers, maybe even harness interfaces—to simplify logistics for B2B customers.
5. Power, durability and environmental readiness
Guides and outfitters abuse equipment—not intentionally, but by using it hard in harsh places. A handheld thermal binoculars OEM supplier must design for that reality.
5.1 Battery system for long nights
Consider a guide on a 10-hour shift in cold weather:
- Single charge runtime for handheld thermal binoculars should realistically be 6+ hours at typical brightness and usage.
- Provide hot-swappable battery packs so they can be changed without fully powering down.
- Use common batteries across your binocular, monocular and scope lines to simplify spares.
In B2B specs, define:
- Working temperature range (e.g. –20 °C to +50 °C).
- Runtime at specific temperature points (especially at –10 °C to 0 °C, where many hunts happen).
- Charge options: vehicle chargers, external power banks, charging docks.
5.2 Durability and environmental sealing
Thermal binoculars will see:
- Dust, sand and mud
- Rain, snow and condensation
- Drops from vehicles, towers or stands
Ask your China manufacturer for:
- At least IP66–IP67 ingress protection for serious pro-grade models.
- Drop test results (e.g. 1.5 m or 2 m onto concrete in multiple orientations).
- Lens and display protection: recessed glass, sacrificial windows, or screw-in protectors.
Durability is also a key selling point in B2B marketing. Outfitters want to know that if a client drops the binoculars once, their season isn’t ruined.
6. Software, UX and team workflows
Good handheld thermal binoculars make it easy for guides to see. Great ones make it easy to work as a team.
6.1 Palette and image controls
Guides rarely want to play with 12 color palettes. They want:
- 2–3 reliable options (white-hot, black-hot, high-contrast “search” mode).
- Simple, predictable behaviour: one button cycles through in a fixed order.
- Automatic image optimization that recovers quickly after panning across hot/cold scenes.
Advanced users may appreciate custom settings, but keep them in a “pro menu” so casual operators and temporary staff don’t get lost.
6.2 Rangefinding and ballistic integration
If your binoculars include a laser rangefinder module, they become more powerful for:
- Calling distances for clients using daylight scopes.
- Feeding range data into thermal rifle scopes or ballistic apps.
- Coordinating shots among multiple hunters or guides.
When working with a handheld thermal binoculars OEM factory that also makes laser rangefinder modules, you can often build shared components and protocols between binoculars and weapon optics. This increases your long-term flexibility and reduces engineering cost.
6.3 Recording, sharing and training
For outfitters, recorded images and video serve several purposes:
- Client experience: showing the stalk or recovery footage later in camp.
- Training: reviewing decision-making with new guides.
- Liability and documentation: in some regions, having a visual record helps resolve disputes or prove ethical behaviour.
Design your handheld thermal binoculars so:
- Still image capture is a single press with clear on-screen confirmation.
- Short video recording is easy but hard to trigger by mistake (e.g. long-press).
- Files are named and tagged with date/time, device ID and maybe GPS coordinates.
Connectivity options (USB-C, Wi-Fi, Bluetooth, app integration) should be planned based on your target B2B customers. Some will just plug into a laptop in camp; others want to push clips to a cloud system or social channels.
7. Portfolio strategy: binoculars, monoculars and scopes as one family
From a distributor or outfitter viewpoint, your brand is not a single product—it’s a toolbox. Handheld thermal binoculars should fit into that toolbox alongside monoculars and scopes.
7.1 Product ladder idea
A simple ladder might look like this:
| Level | Product type | Role in the field | Typical buyer |
|---|---|---|---|
| Entry | Compact thermal monocular | Backup, simple spotter, rental fleets | Smaller outfitters, clients themselves |
| Mid | Handheld thermal binoculars | Main guide glassing tool, all-night use | Guides, outfitters, ranch staff |
| Premium | Thermal rifle scopes / clip-ons | Shooting optics paired with binoculars or monoculars | Serious hunters, pro staff |
In this picture, handheld thermal binoculars are the central professional product: monoculars feed into them as entry tools, and rifle scopes form the aspirational top of the line.
7.2 B2B positioning and pricing
For B2B:
- Handheld thermal binoculars should command higher price and margin than monoculars because they are primary working tools.
- They should usually be priced below rifle scopes that include full ballistic and mounting systems.
- Offer volume pricing and fleet packages for outfitters buying multiple units at once.
On your website, internal links like thermal binoculars, thermal monoculars OEM/ODM and thermal clip-on sight OEM/ODM help visitors see the range at a glance and move between categories.
8. Working with a handheld thermal binoculars OEM/ODM partner in China
If you’re not building everything in-house, you will likely cooperate with a handheld thermal binoculars China manufacturer, factory or OEM supplier. Getting the relationship right is as important as the spec.
8.1 What to look for in an OEM partner
- Module competence: can they design and build thermal imaging modules, or do they only assemble?
- Binocular experience: do they already supply handheld thermal binoculars to other brands?
- Integration know-how: can they integrate LRF modules, Wi-Fi, recording and firmware in one platform?
- Quality system: do they have clear test protocols, traceability and environmental testing?
You can check their broader capabilities on integration pages similar to thermal camera module integration and rangefinder module integration.
8.2 Translating your design into an OEM brief
A strong OEM brief for handheld thermal binoculars should include:
- Use cases and personas
- Night guiding, outfitting, ranch work, camp security.
- Optics and performance targets
- Resolution, lens options, FOV, target detection/ID ranges.
- Ergonomics and weight limits
- Maximum device weight, target balance, button layout sketches.
- Battery and runtime requirements
- Hours at given temperatures, type of cells, common battery strategy.
- Environmental and durability expectations
- IP rating, drop tests, operating temperature.
- Software and workflow features
- Palettes, rangefinding, recording, metadata, connectivity.
- Service & lifecycle
- Expected years in production, spare parts policy, firmware update strategy.
When reviewing proposals from different handheld thermal binoculars manufacturers or suppliers, compare not just price and sensor, but also their willingness to co-own these details and support you over several product cycles.
9. Spec & decision checklist
To turn all of the above into concrete decisions, you can use a simple checklist when evaluating designs or OEM proposals:
| Area | Key question for handheld thermal binoculars design | Notes / decisions for your brand |
|---|---|---|
| Sensor & lens | Does this combo give guides the right balance of range and FOV for our terrain? | |
| Weight & ergonomics | Can a guide glass with this unit for 6 hours without significant fatigue? | |
| Controls & UI | Can all core functions be used with gloves, in the dark, without looking at buttons? | |
| Battery & runtime | Will the device comfortably cover a full night shift in our coldest conditions? | |
| Durability & sealing | Will drops, dust and rain during a full season be survivable without constant repairs? | |
| B2B pricing & positioning | Where does this model sit between our monoculars and rifle scopes for dealers? | |
| OEM partner fit | Does the China factory understand guiding workflows and support long-term roadmap? |
You can turn this into an internal scoring sheet when shortlisting platforms from different handheld thermal binoculars OEM factories.
Frequently Asked Questions {#faq}
Q1: Why do guides prefer handheld thermal binoculars over monoculars?
Using both eyes reduces fatigue and helps depth perception. For long nights of glassing, handheld thermal binoculars feel more natural and less tiring than monoculars, especially when guides are constantly explaining what they see to clients.
Q2: What is the ideal magnification for handheld thermal binoculars used all night?
For general guiding, a base magnification around 2–3× with a moderate field of view is a strong starting point. Open-country or mountain outfitters may prefer 3–4×, sometimes paired with a narrower FOV and higher resolution sensors.
Q3: How important is an integrated laser rangefinder in handheld thermal binoculars?
For many guides and outfitters, a built-in LRF is extremely valuable. It speeds up decision-making, improves shot calls and makes it easier to coordinate with clients using daylight or thermal rifle scopes. However, it also adds cost; some brands offer LRF and non-LRF versions.
Q4: Can handheld thermal binoculars share batteries and accessories with other products?
Yes—and it’s recommended for B2B. Designing binoculars around the same cells, chargers and some mounts as your monoculars and scopes simplifies inventory for dealers and outfitters, and lets OEM factories standardize components.
Q5: What is the key advantage of working with a handheld thermal binoculars OEM supplier in China?
A capable China manufacturer can combine thermal imaging modules, optics, mechanics and electronics into a single platform that you can brand, customize and extend into a full product family. This reduces your development cost and time while still allowing meaningful differentiation.
Summary: turning design theory into a real binocular line
For guides and outfitters, handheld thermal binoculars are the main working tool in the dark. When you design them as a B2B brand—with real use cases, ergonomics, power, durability and workflow in mind—you create products that teams rely on every night and reorder every season.
Key takeaways:
- Start from guide workflows, not from resolution charts.
- Structure your line so handheld thermal binoculars sit at the professional center, supported by monoculars below and rifle scopes above.
- Work with a handheld thermal binoculars OEM/ODM factory that understands thermal modules, LRF integration and long-term quality.
- Standardize batteries, controls and software conventions across your portfolio to make life easier for outfitters and distributors.
If you are exploring a next-generation binocular line, Gemin Optics can help you combine proven thermal camera modules with binocular-specific housing, optics and UX tuned for professional guides and outfitters. When you’re ready to talk concepts, specifications or OEM roadmaps, you can contact us and turn this guide into a real product family.